Create and publish your space
A new space is created in the browser. It goes public once three start tasks are done – usually already at the end of the wizard.
You create a space with a wizard. Three start tasks decide whether it may go public: desks, a plan and the Impressum. The wizard asks for all three.
Before you start: you need the name of your space, who legally owns it, its address, the number of desks you have and at least one price.
- Open Selfdesk in a browser and start Create space. On selfdesk.app, Try free leads there. If you are not signed in yet, you first enter your email address and then the six-digit code from the email; if the address is new, your account is created along the way. You do not need a password. A new space can only be created on a computer, not in the app.
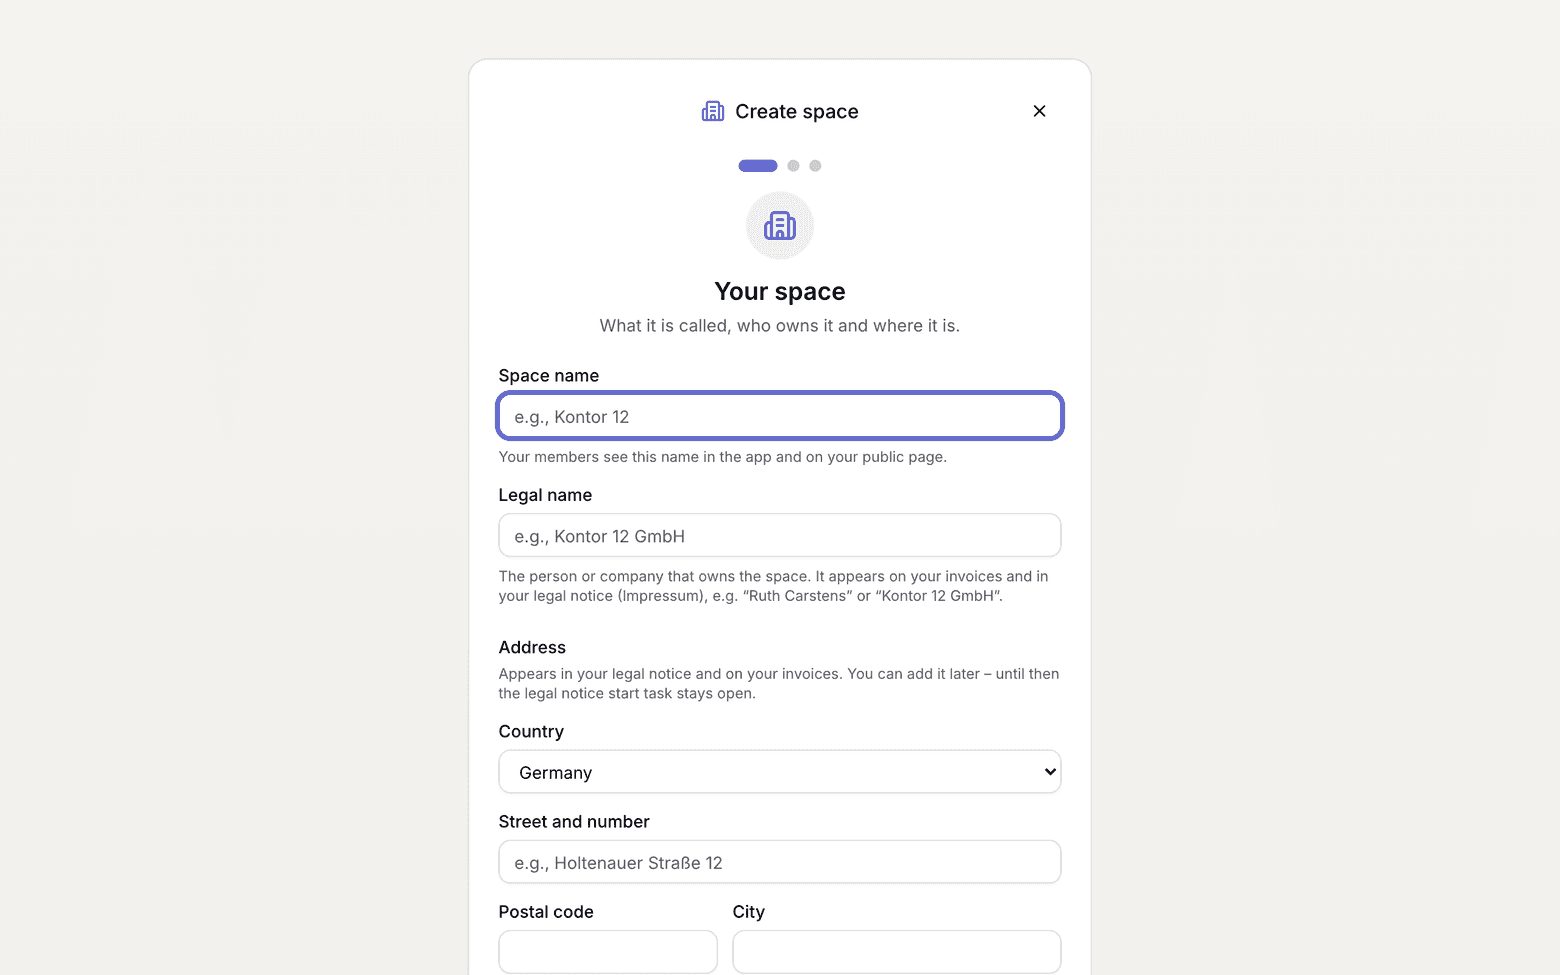
First wizard step with the name field - Step Your space: enter the name members see, and the legal name, the person or company that owns the space. The legal name starts out as the space's name; change it if it differs. Choose the legal form. If it needs a register entry or representatives (a GmbH, for example), you add them under Legal notice after creating the space; until then your space is not public. Below, pick the country and enter the address.
- Step Offerings: enter how many desks you have, which plans you sell, whether you rent out rooms and when you are open. The amounts that are filled in are suggestions, not a default the app keeps calculating with later.
- Step Payment method: add the payment method for your Selfdesk subscription. The billing address is the address from step 1; use Change to give a different one.
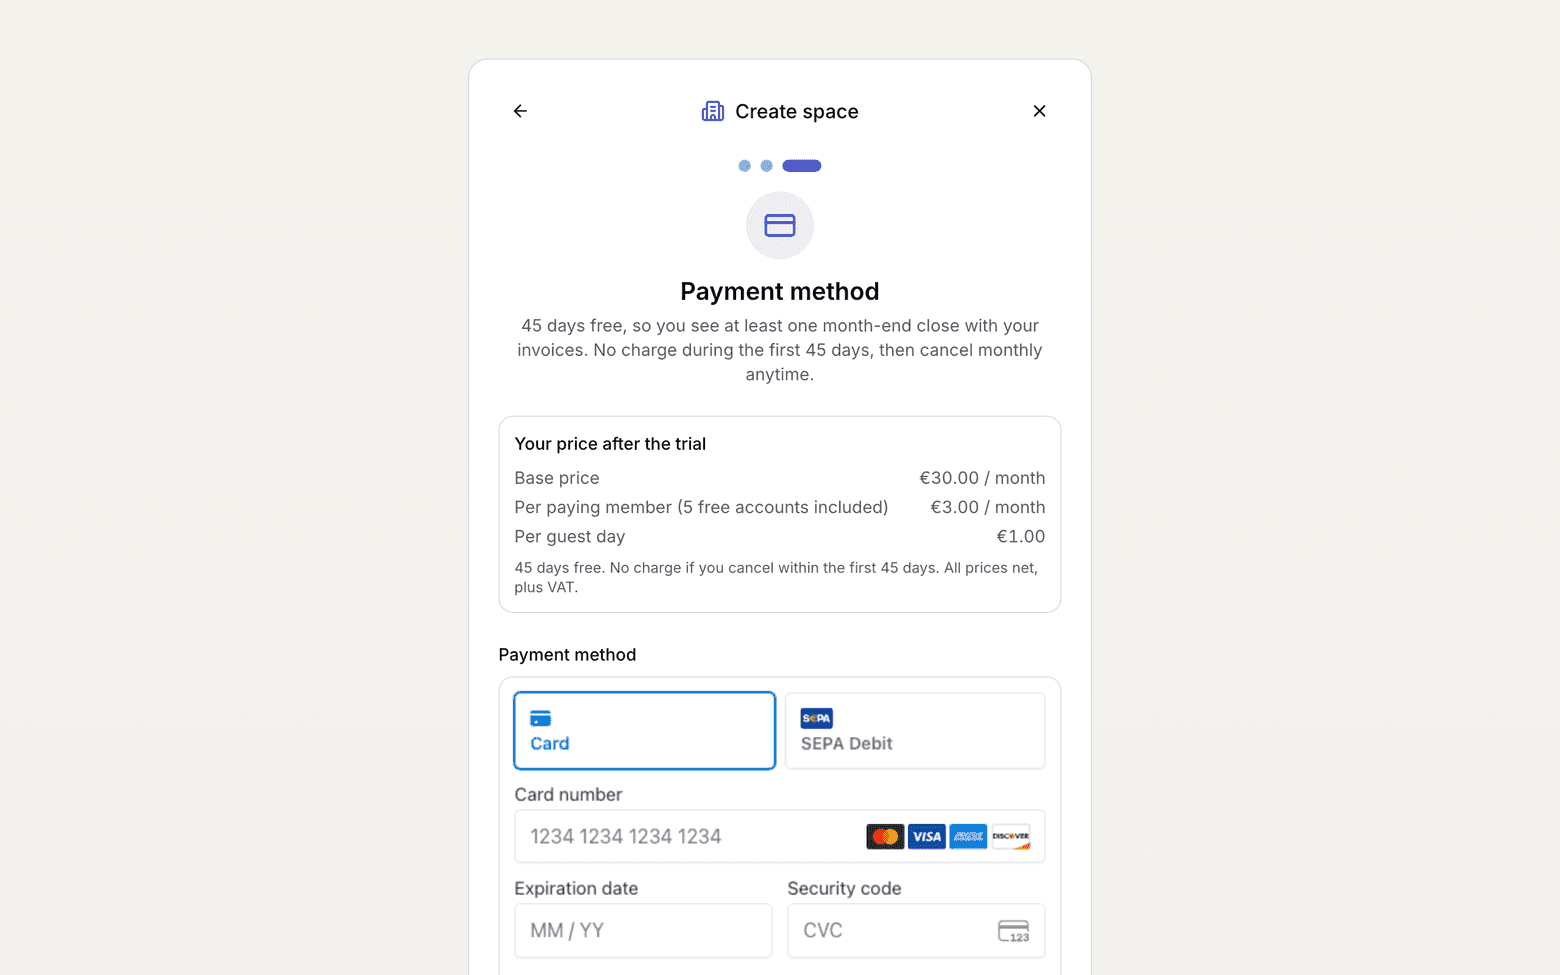
Third wizard step with the payment form - If you entered the address, your space is public afterwards. The wizard shows the link to its page, and members can sign up and book.
- If you left the address empty, the space stays a draft. Go to setup leads to the task list; if you started the wizard from the app, Continue in the app takes you back there. In the app Setup sits in the Manage tab, on the web in the sidebar under Management.
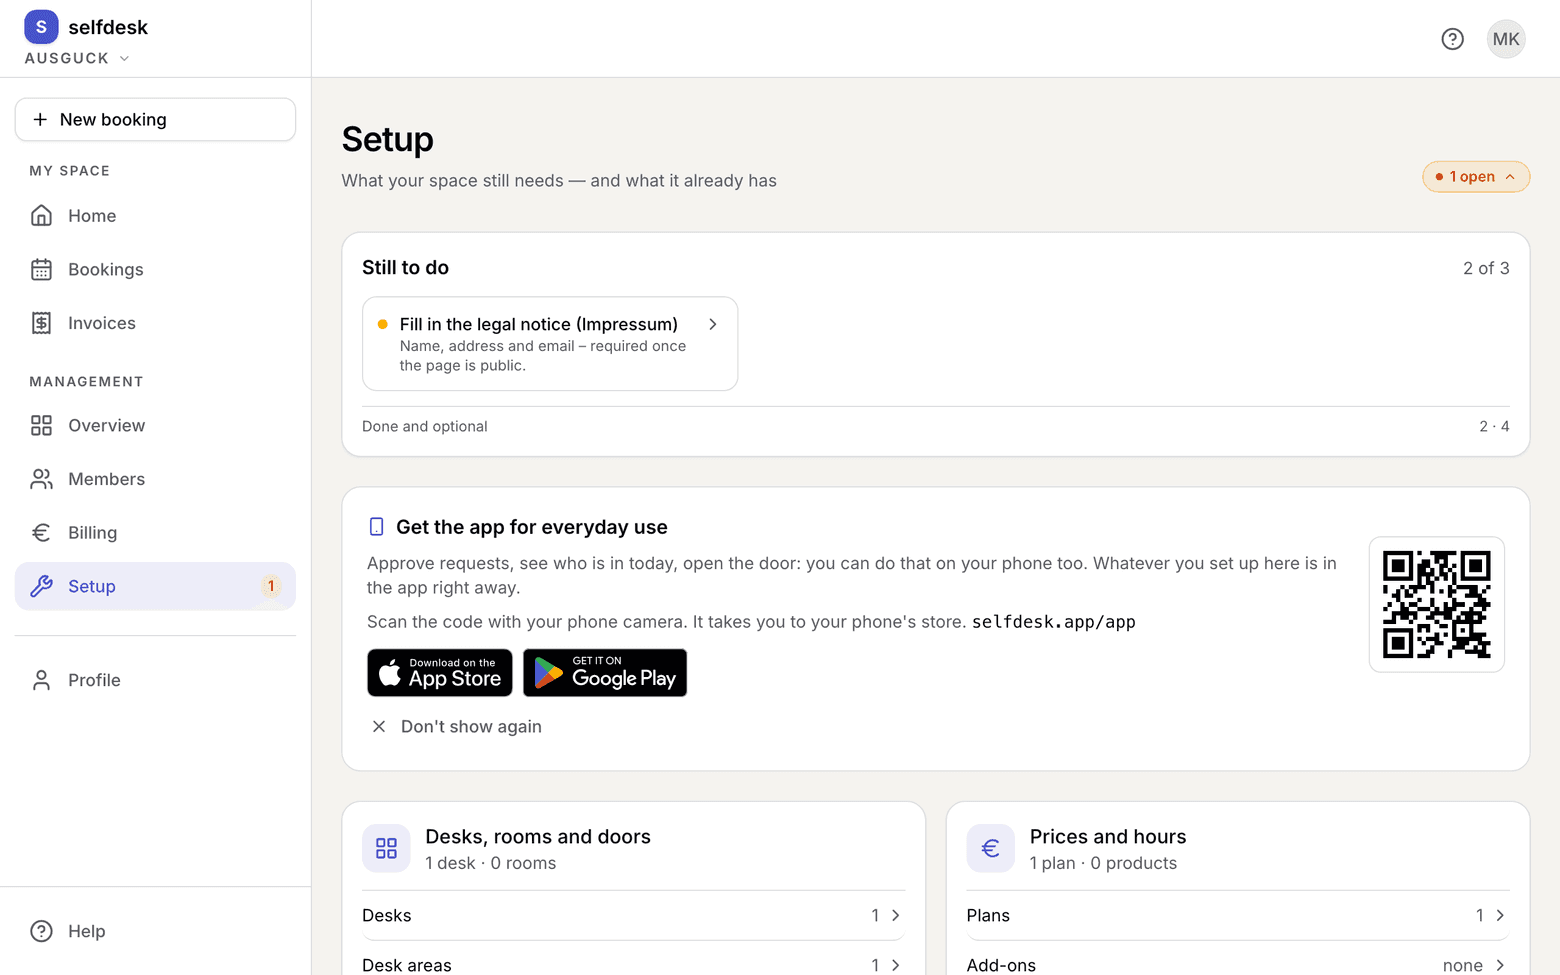
Task list in the draft state with the marker in the top right - Add the address under Fill in the Impressum. The marker then reads ready to go and the list holds only Publish your space. That row leads to Public page.
- Flip the switch there. Members can sign up and book after that.
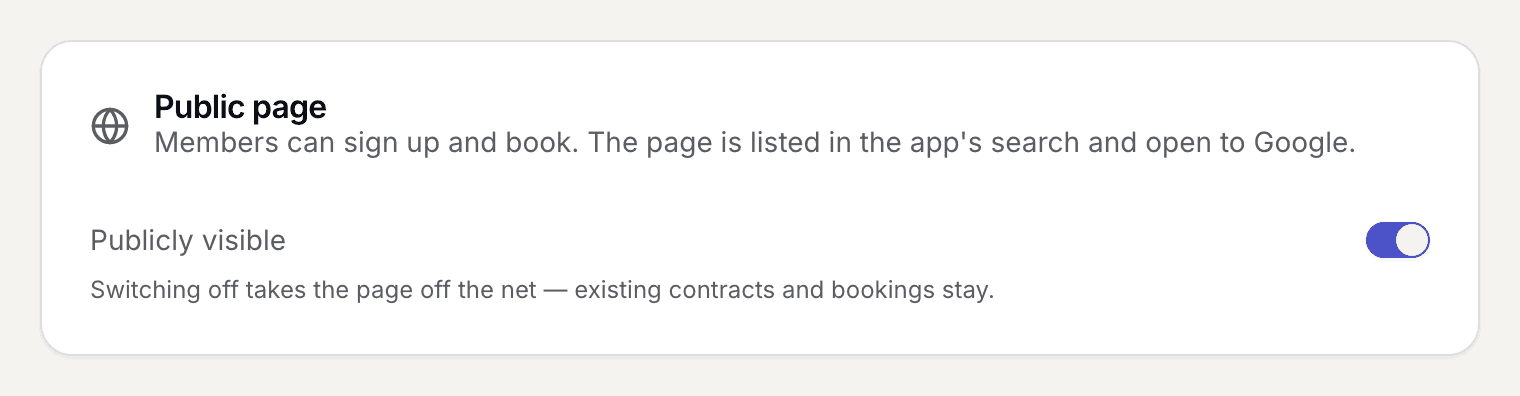
The Public page card with its switch
What applies here
- There is no separate publish button. The last task leads to the switch you also use later to take the space off the net. See Start task, suggestion, inventory.
- You do not need Stripe to publish. Without Stripe your members pay by bank transfer; card and direct debit are added once you connect Stripe. Setup offers this as the suggestion Accept card and direct debit. See Connect Stripe.
- While the space is public, its page is listed in the app's search and in the list Selfdesk hands to Google. It usually takes a few days to show up on Google.
- Switching Public page off again removes the page from the directory and, the next time Google fetches it, from the search results. Existing contracts and bookings stay.
- You can leave the address empty in the wizard. Fill in the Impressum then stays open until you add it in the space settings. As the email for the legal notice, Selfdesk takes the address you signed up with; you can change it under Impressum. The wizard does not ask for phone, VAT ID or tax number; they are there too. See Maintain your legal details.
- The address search in Street and number only knows Germany. In other countries you type the address in.
- The order of the three start tasks is up to you. All that is counted is how many of the three are done. See Start task, suggestion, inventory.
When it does not work